

Arleta, CA · January 2025 · LADWP / LADBS
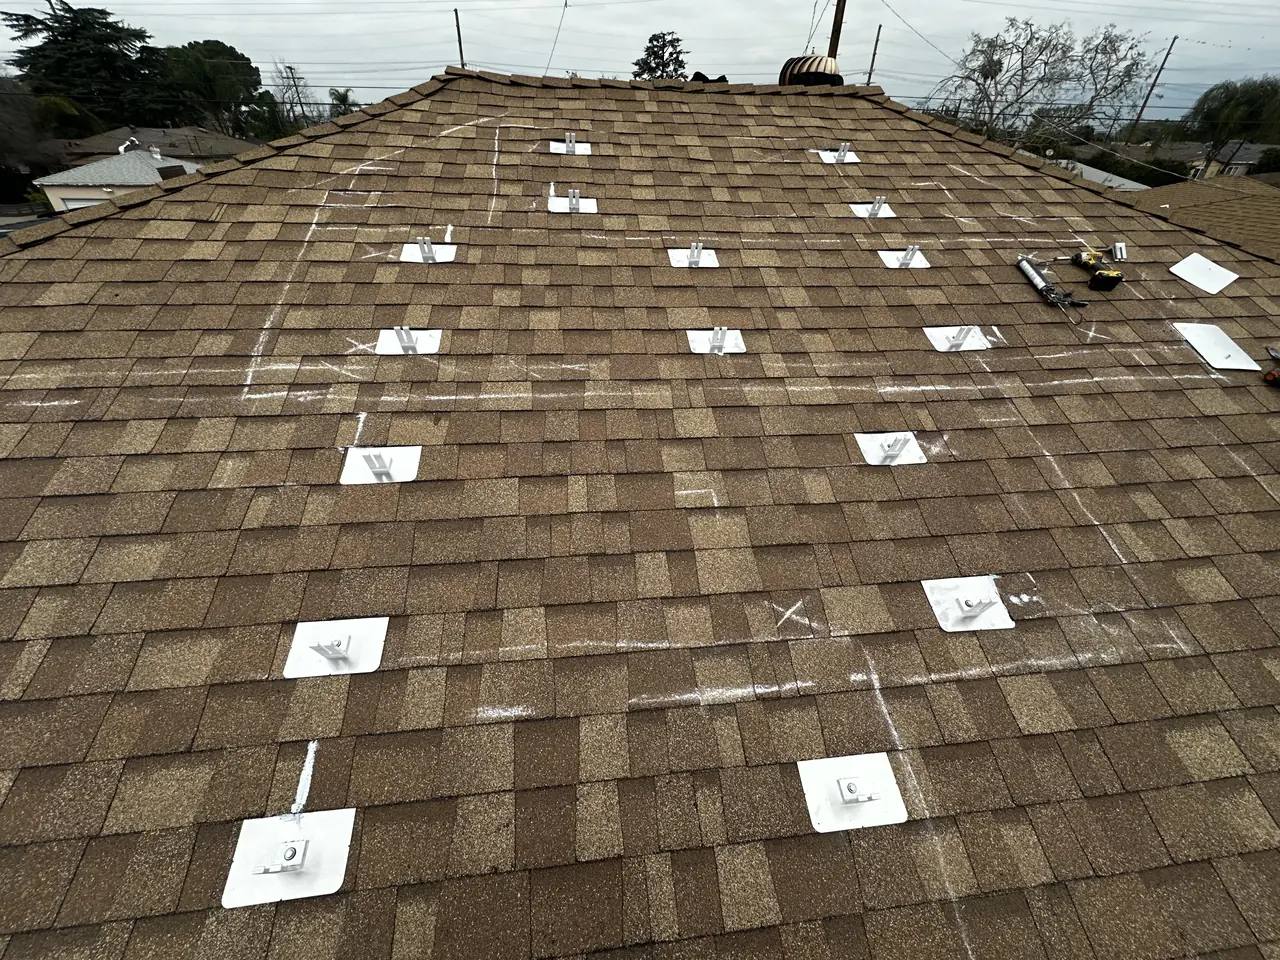
Chalk lines on an Arleta roof, before a single hole.
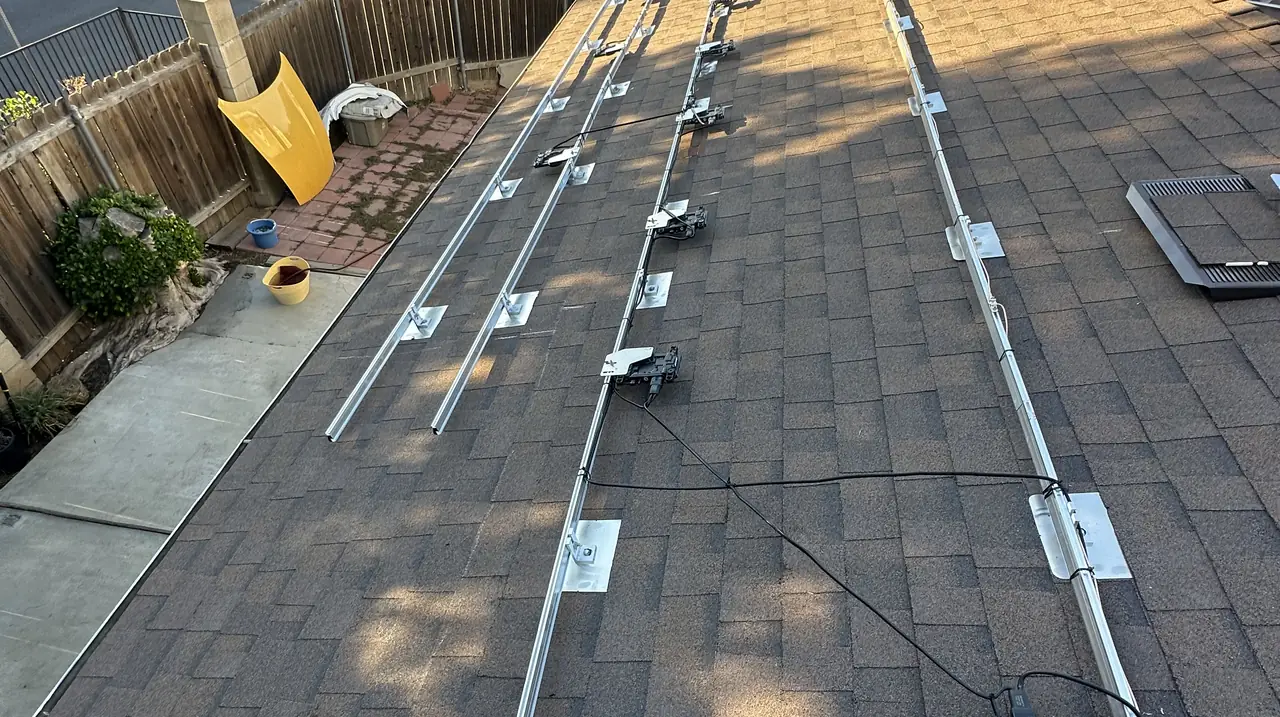
An Arleta installation caught at the stage nobody sees: both roof planes marked out, every flashing in position, and not one penetration made yet.
On a well-run installation the whole array is set out on the roof before anything is drilled. Rafter lines are found and chalked, the rail lines are snapped across the plane, and a flashing is laid down at every point where an attachment will go — so the full layout can be seen, checked and corrected while correcting it still costs nothing. On this Arleta roof Cali Energy marked out both planes that way before the first hole was made, then installed all-black modules with an Enphase IQ8MC microinverter under each one. Everything after the chalk is execution.
At a glance
- Roof
- Composition shingle, two planes
- Microinverters
- One under each module
- Combiner
- Enphase IQ Combiner on the exterior wall
- Installed
- 30 January 2025
- Layout method
- Rafter lines chalked and flashings set out before drilling
- Utility / AHJ
- LADWP / LADBS
The story
This Arleta job began with a bare shingle roof, chalk lines across it and a flashing plate sitting at every point where an attachment was going to go. No rails, no modules, no holes. The entire array, laid out on the roof, before anything is committed.
That is the order Cali Energy works in, and it is not how every installation runs. The alternative — drill the first attachment, set a rail, work outward and adjust — produces a roof where each correction is a hole that has to be sealed and abandoned. Setting the whole layout out first means the mistakes get made in chalk.
What is being checked at that stage is specific. The rafter lines have to be found, because every attachment goes into a rafter rather than into the decking between them, and on an older house the rafter spacing is not always what the tape says it should be. The rail lines have to be square to each other, because a pair of rails that is slightly out at one end is badly out at the other. The fire setbacks have to be measured off the ridge and the edges, and they take real space. And the whole thing has to fit inside what is left.
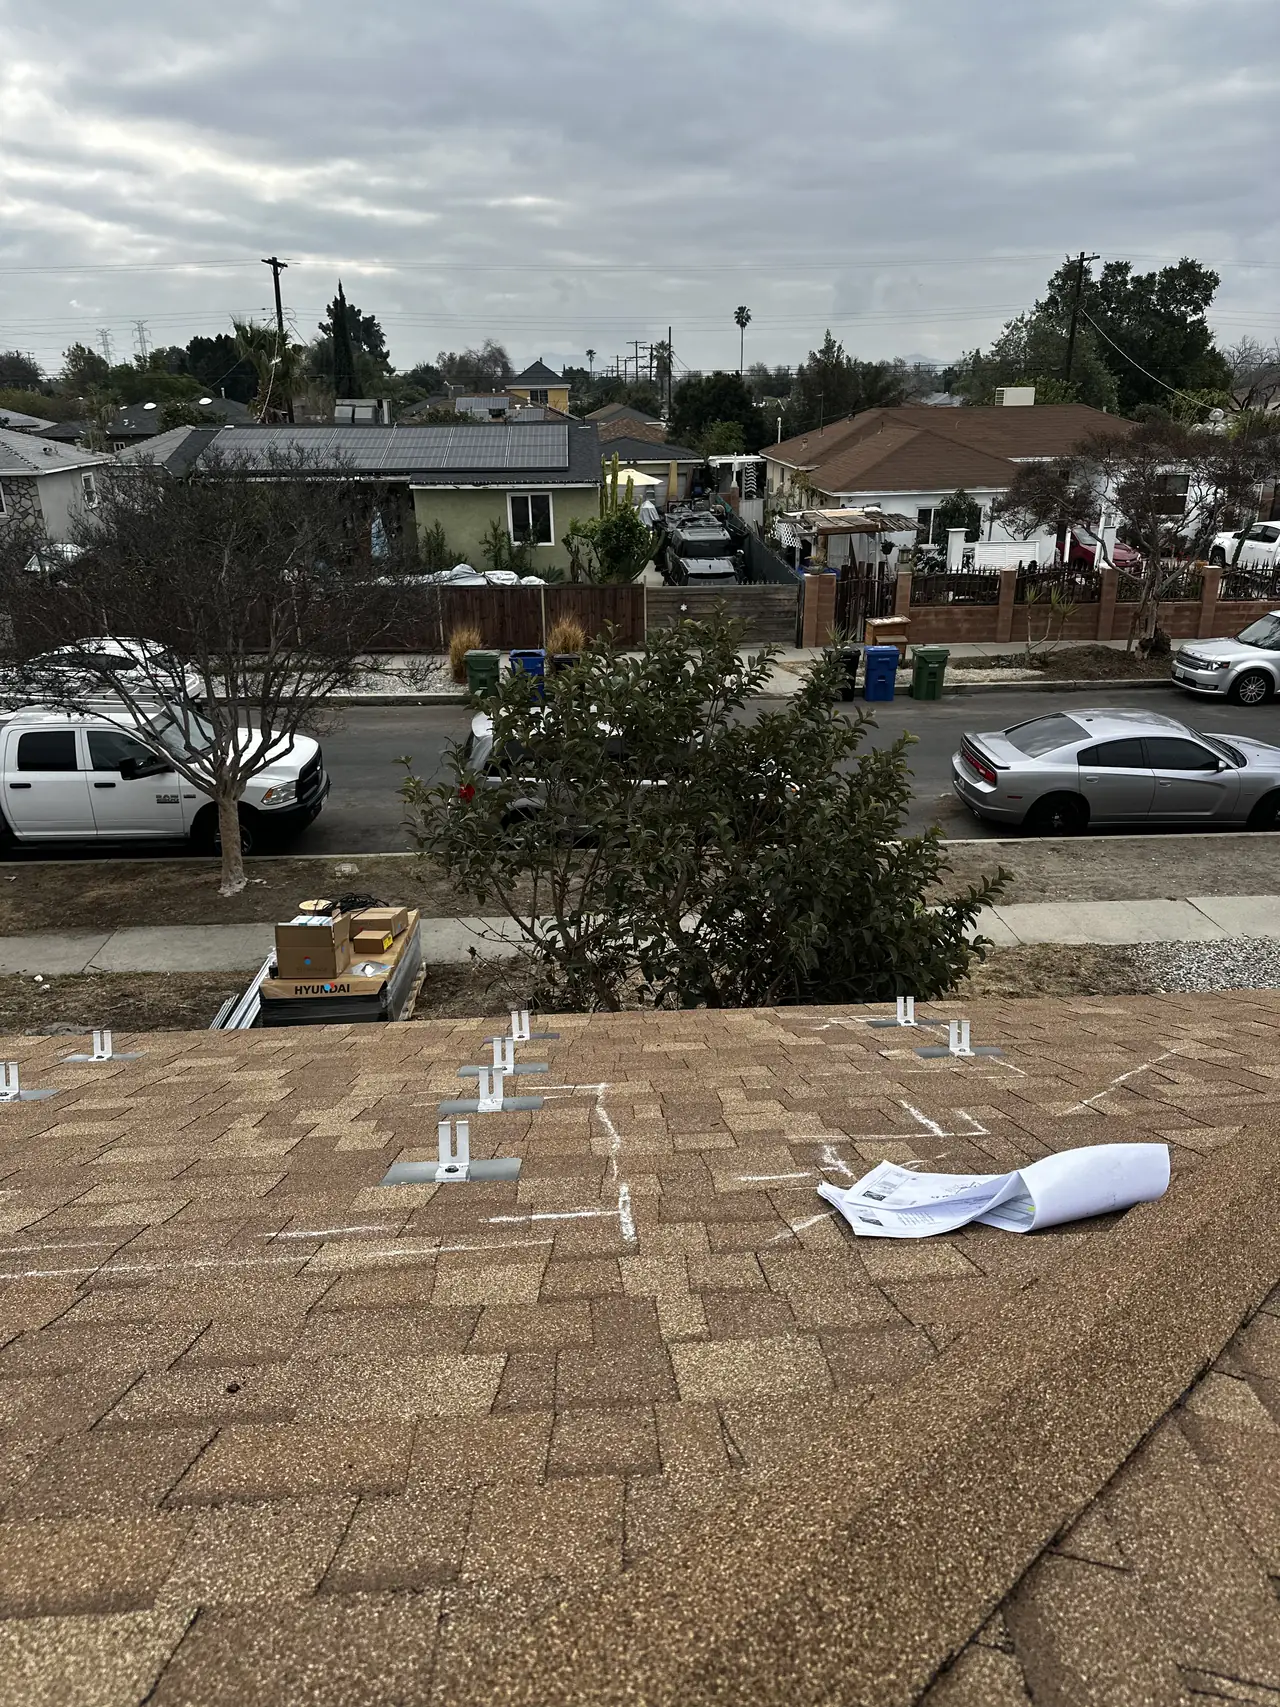
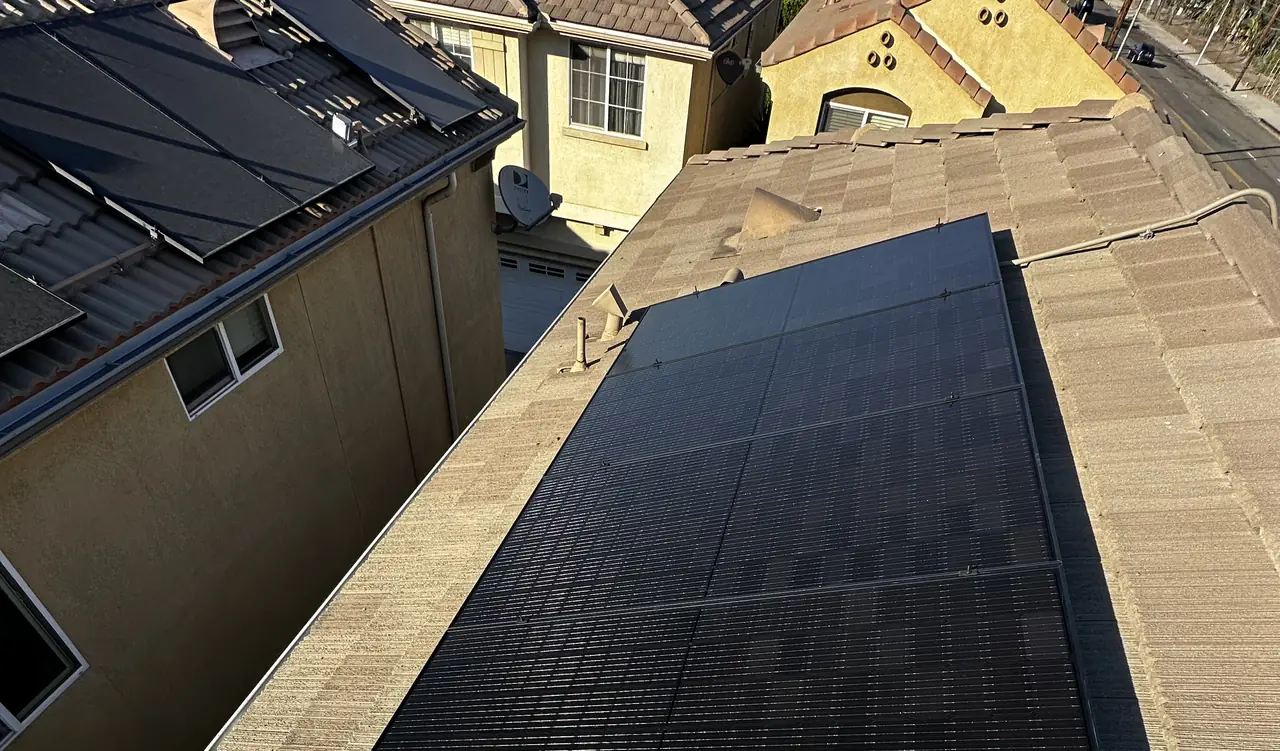
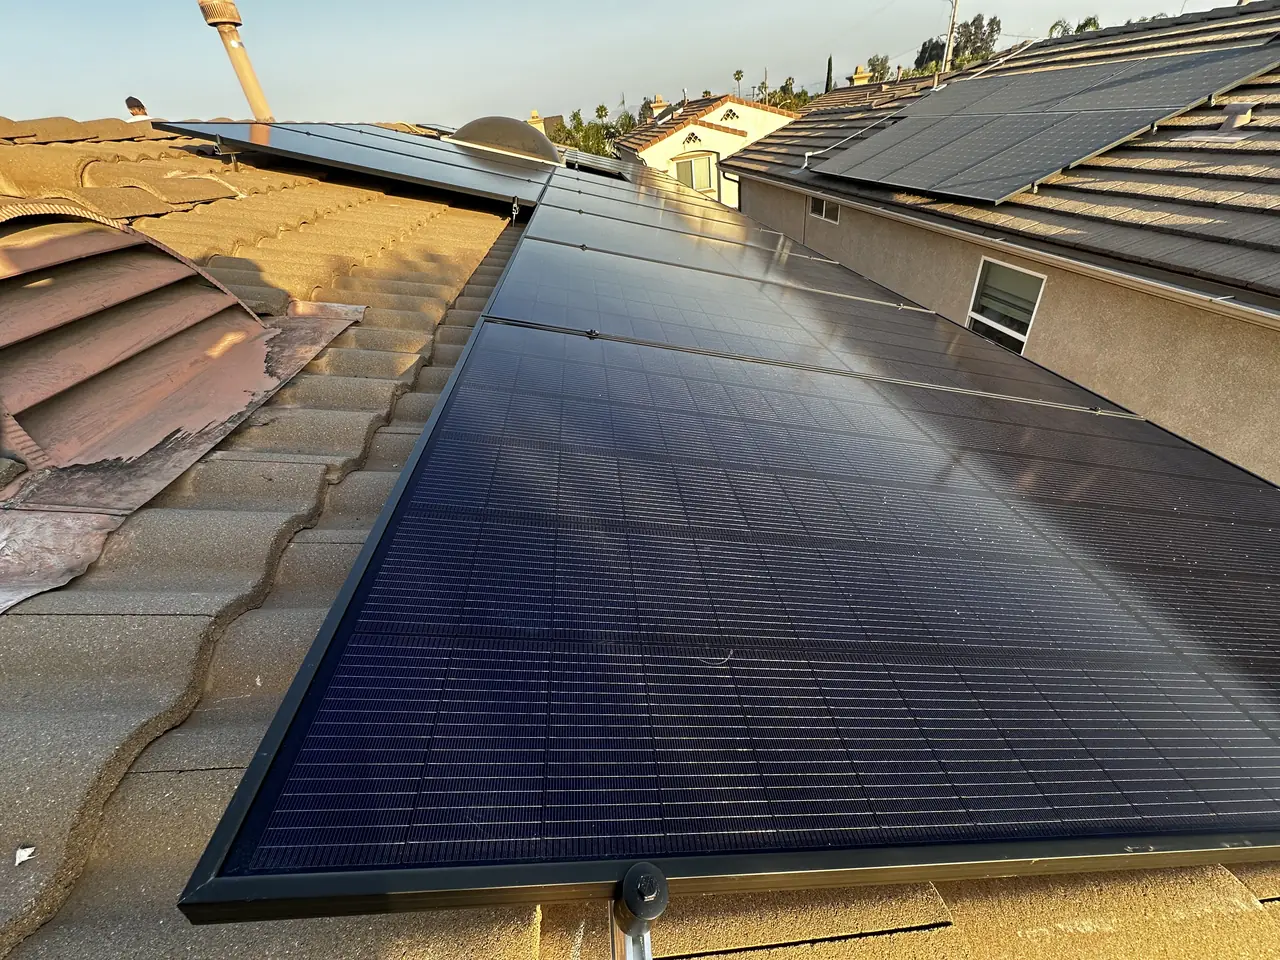
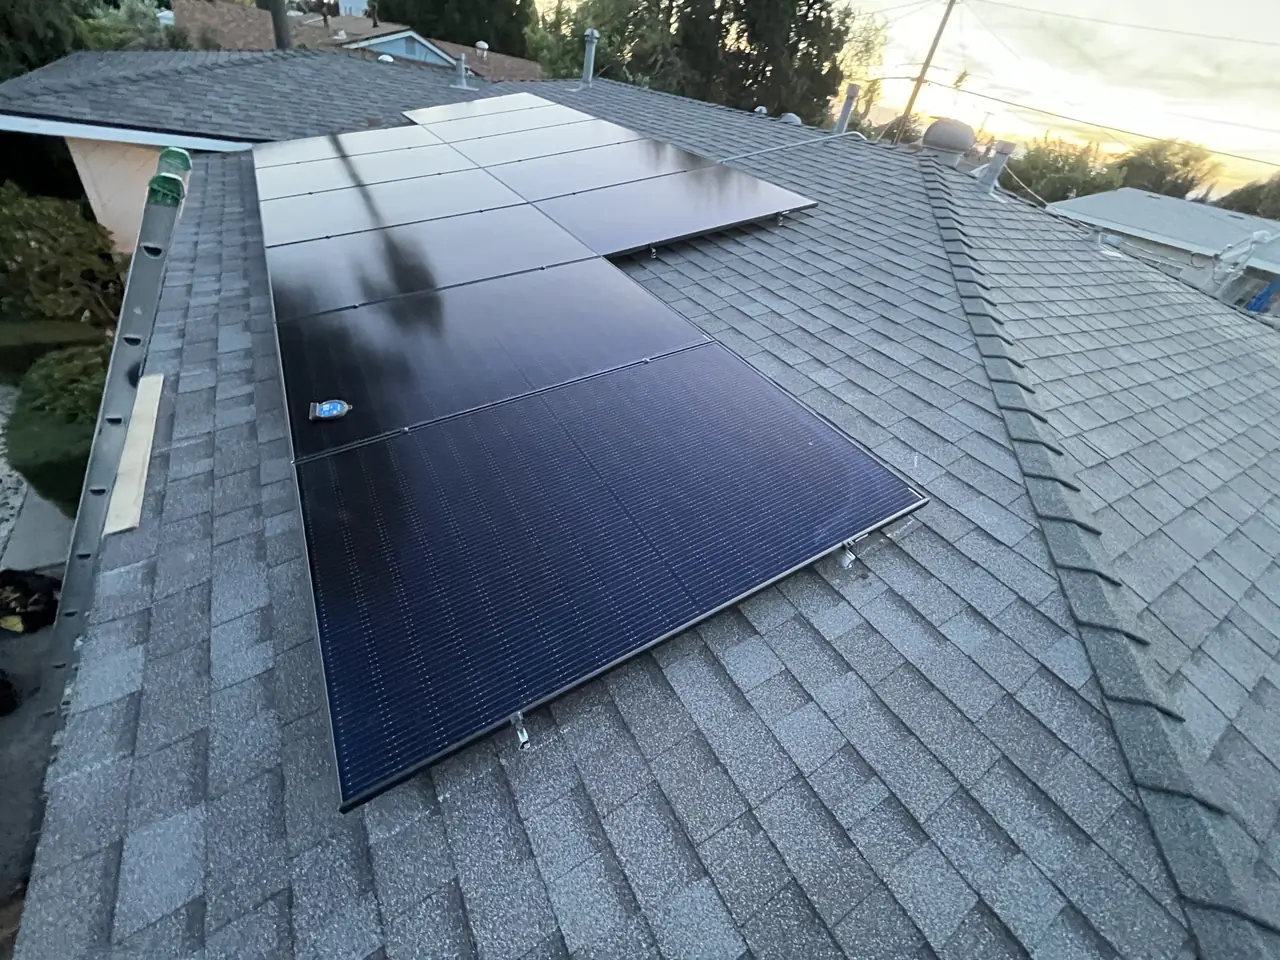
This roof has two planes, front and back, and both were set out the same way. Splitting an array over two faces is common on a hipped roof and it is not a compromise here: with a microinverter under each module, the two orientations produce at different times of day without either face holding the other back.
The microinverters are the reason the wall equipment on this house is small. Rather than one central inverter, each module has its own unit clamped to the rail beneath it, converting on the roof. What goes on the exterior wall is a combiner next to the existing meter and service panel — a box, a disconnect and the conduit between them, rather than the large wall-mounted inverter people expect from photographs of older systems.
The penetrations themselves follow the layout that was set out. Each attachment goes through the shingle into the rafter, and the flashing plate set out at the start slides up under the course of shingles above it, so that water running down the roof passes over the flashing rather than into the hole. Sealant is a secondary defense at the bolt, not the thing keeping the roof dry.
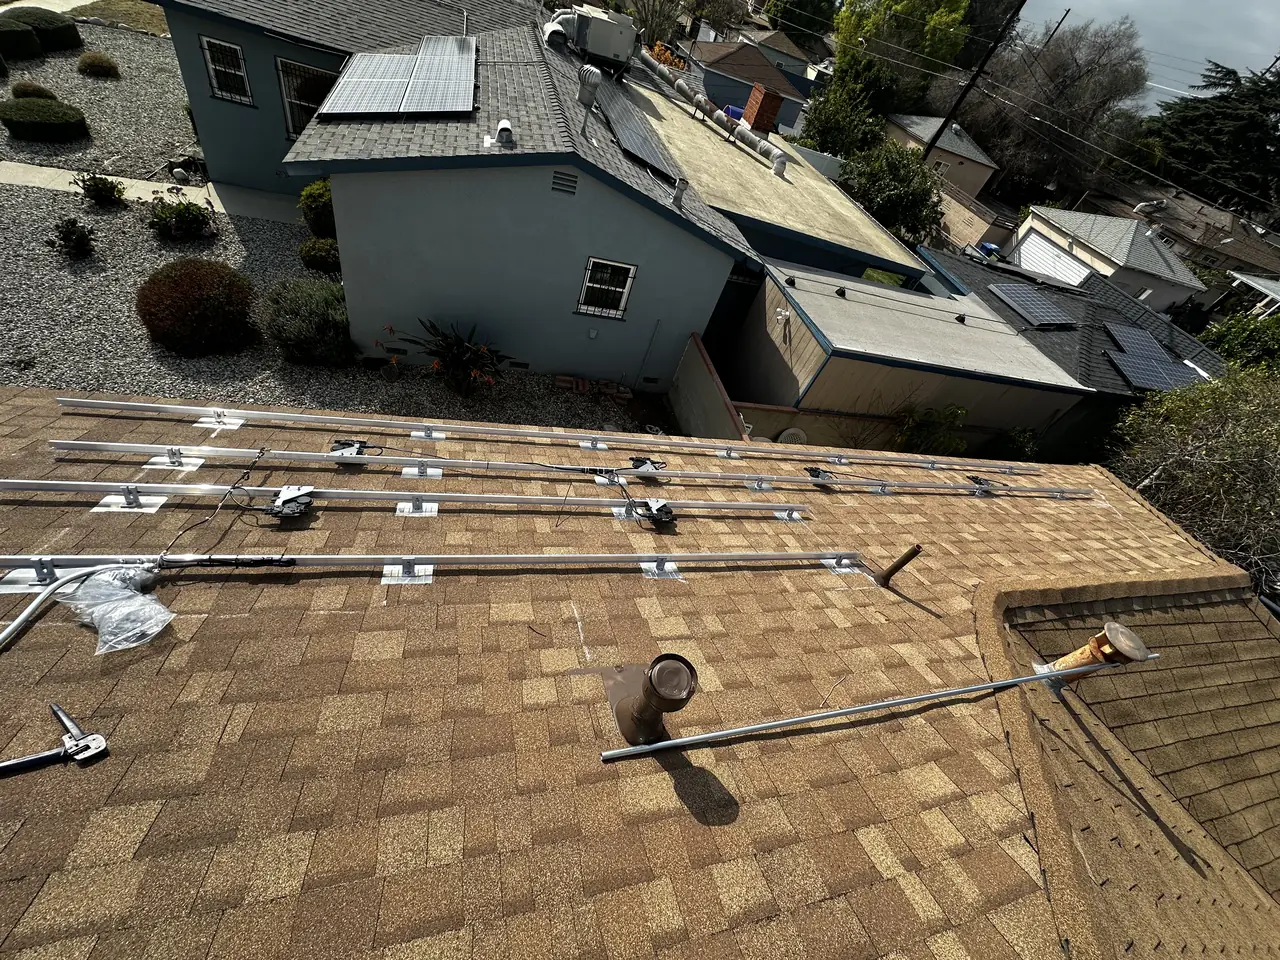
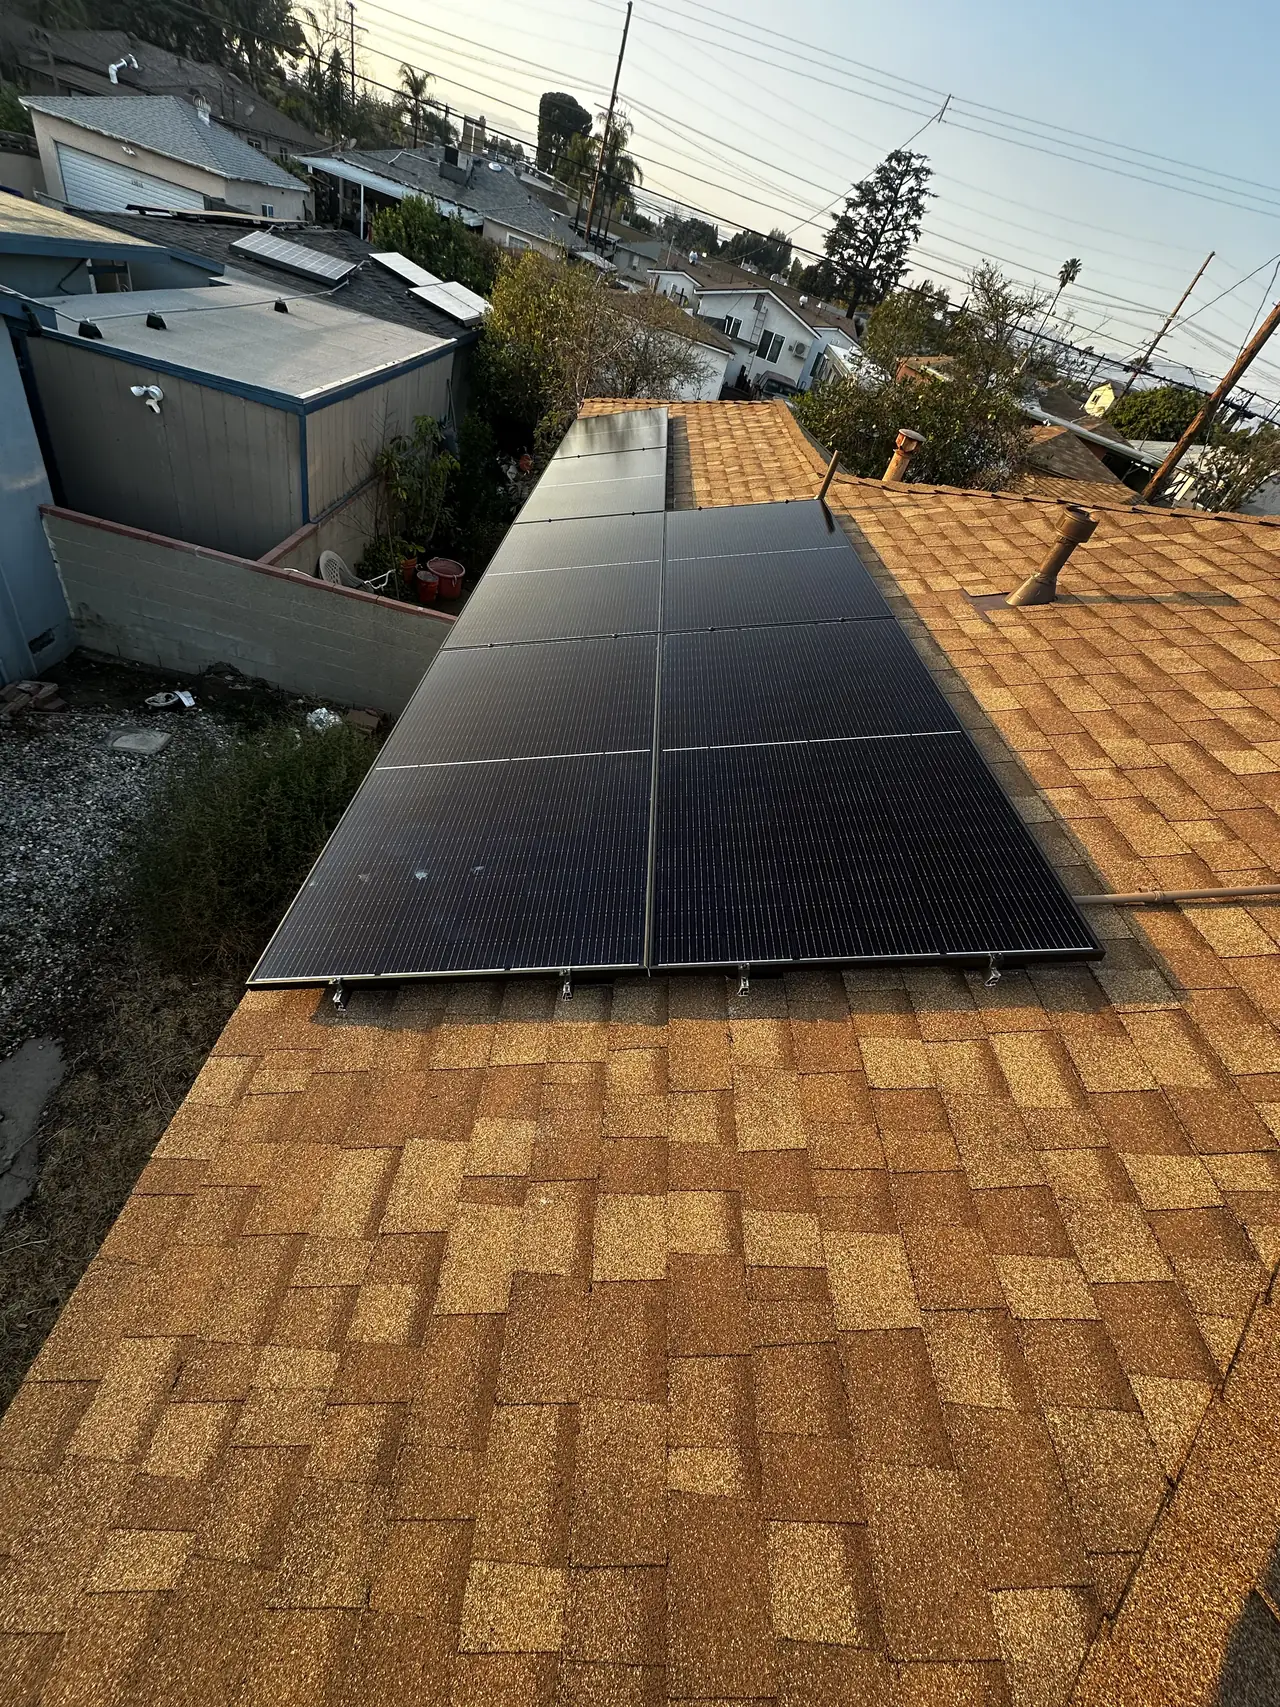
Then the rails go on, then the modules, and the array in the finished photographs is simply what the chalk already said it would be.
How it ran
| 30 January 2025, first | Rafter lines chalked and flashings set out across both roof planes |
|---|---|
| 30 January 2025, then | Penetrations made, flashed and rails set |
| 30 January 2025, last | Modules and microinverters installed; combiner and disconnect set on the exterior wall |
A single installation day, photographed at each stage. This timeline reflects this property and this period.
What we did
- Chalked rafter and rail lines across both roof planes before drilling anything (C-10).
- Laid out every flashing in position so the full array could be checked in chalk.
- Measured the fire access setbacks off the ridge and edges before fixing the layout.
- Set each attachment into a rafter and flashed it under the shingle course above.
- Installed a microinverter under each module rather than a central wall inverter.
- Mounted the combiner and AC disconnect beside the existing meter and service panel.
System specifications
| Roof | Composition shingle |
|---|---|
| Planes | Two — front and back |
| Modules | All-black |
| Microinverters | One per module, rail mounted |
| Wall equipment | Combiner and AC disconnect beside the existing meter |
| Attachments | Through-shingle into rafters, flashed under the course above |
| Utility / AHJ | LADWP / LADBS |
Is your project like this one?
- You want to know what a good installation looks like before the modules arrive.
- Your roof has two planes and you are unsure whether to use both.
- You are deciding between microinverters and a central inverter.
- You want to know what equipment ends up on the outside wall.
- You are in ZIP 91331 and not sure whether you are Arleta or Pacoima.
Cali Energy in Arleta
Arleta is a City of Los Angeles neighborhood in the northeast San Fernando Valley, sharing ZIP 91331 with Pacoima. The permit goes through LADBS and the interconnection through LADWP, the same as anywhere else inside city boundaries.
This installation is on the Arleta projects page alongside the others.
- License and classifications: CSLB #1032379
- Official reference for this process: LADBS — inspections
- Official reference for this process: California Building Standards Commission — California Building Standards Code
Frequently asked questions
Why lay out the whole array before drilling anything?
Because corrections made in chalk cost nothing and corrections made in holes cost a sealed, abandoned penetration. Setting out the rafter lines, the rail lines, the setbacks and every flashing position first means the layout is checked as a whole while it can still be moved. On this Arleta roof both planes were set out that way before the first hole was made.
What goes on the outside wall with a microinverter system?
Much less than with a central inverter. Each module has its own microinverter on the rail beneath it, so the conversion happens on the roof. The wall carries a combiner next to the existing meter and service panel, an AC disconnect and the conduit between them — a considerably smaller installation than a wall-mounted string inverter.
Does Cali Energy install solar in Arleta?
Yes. Arleta is a City of Los Angeles neighborhood sharing ZIP 91331 with Pacoima, so the work runs through LADBS permits and LADWP interconnection the same as anywhere inside city boundaries, and the two neighborhoods are covered together. This Arleta project and nine in Pacoima are on our projects page. Our license is CSLB #1032379.
Is an array split across two roof planes a compromise?
Not with microinverters. Each module converts independently, so a module on the weaker orientation does not pull down the ones on the stronger face. The two planes peak at different times of day, which spreads production rather than concentrating it. On a single string inverter the calculation would be less forgiving.
What this would look like on your roof
Planning solar in Arleta? Tell us your utility, your roof and what your bill looks like now, and we will model what a system like this would do on your house before you commit to anything.
Or call +1 (323) 844-7777 · Cali Energy, Northridge · CSLB #1032379 (B, C-10, C-39) — design, permits, install and electrical under one licensed contractor.
Related
This timeline reflects this property and this permitting path. Updated September 2026.